For most Apple device users, the Apple ID serves as the backbone of their digital experience. It’s more than just a login credential; it’s a gateway to a plethora of services like iTunes, the App Store, and iCloud. Whether you’re using your iPhone, iPad, or Mac, your Apple ID email is pivotal to unlocking an integrated and seamless user experience.
The change in your Apple ID email address doesn’t affect your purchases or data. Rest assured, your account stability remains unaltered after the update process. All previous purchases, whether apps, songs, or movies on iTunes or the App Store, will still be accessible, and your iCloud data will be intact as well.
Let’s delve into the process of how to change your Apple ID email address, focusing on making the process as straightforward and easy as possible.
A Comprehensive Guide to Changing Your Apple ID Email Through the Official Site
Prior to getting started, it’s crucial to ensure that you’re logged out of all Apple devices connected to your specific Apple ID. Equally important is to ensure that you have a recent iCloud backup, to avert any loss of critical information such as contacts or any other data.
Access to your current Apple ID email is also vital, since you’ll need to verify the transition. Hence, having your email account’s password handy is a necessity.
With these considerations in place, let’s dive right into the process:
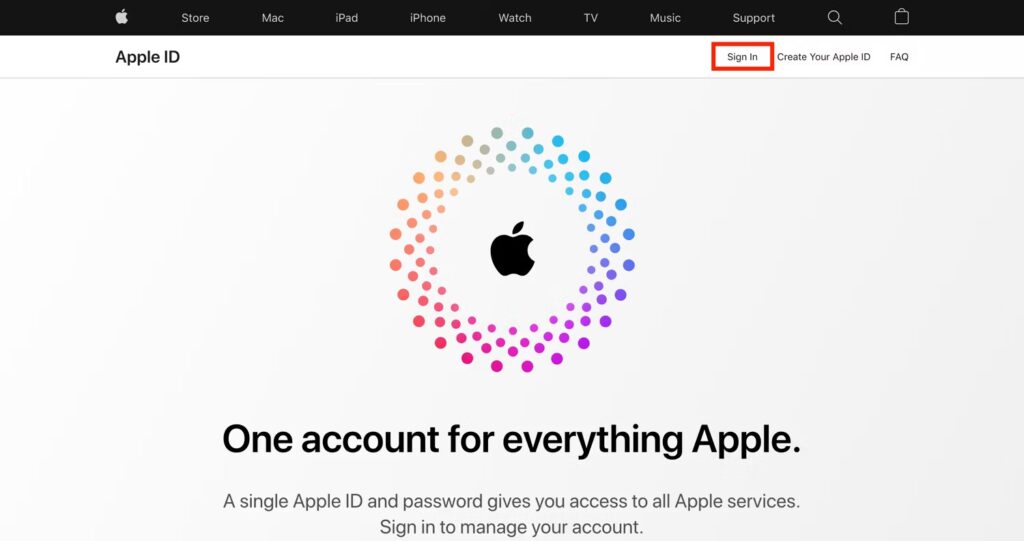
1. Step One: Navigate to appleid.apple.com on your PC, Mac, iPhone, or any other device and log in utilizing your existing Apple ID and password. Remember, if you’re struggling with remembering your Apple ID password, resetting it is a simple process.

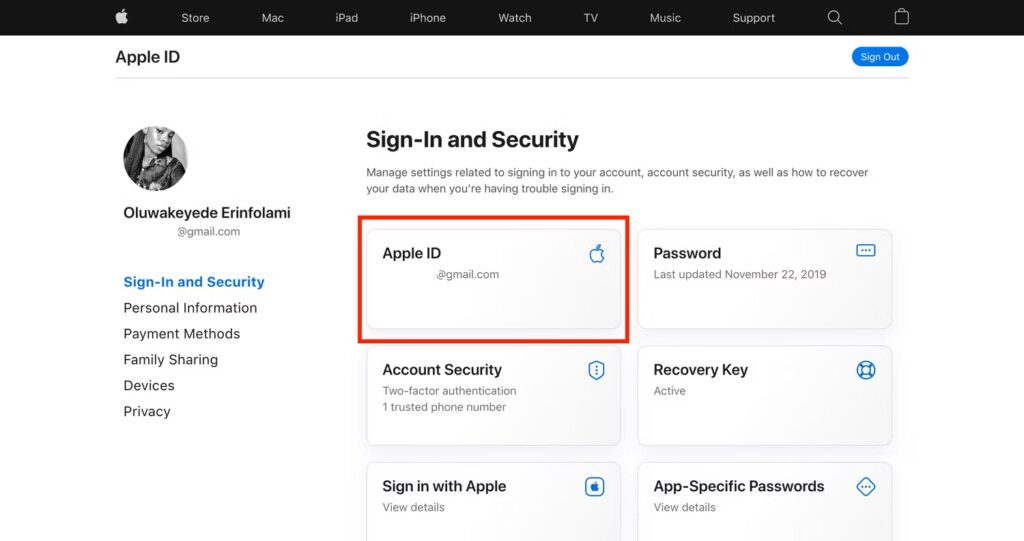
2. Step Two: The website will direct you to the ‘Sign-In and Security’ section immediately. To proceed, click on the Apple ID tab.

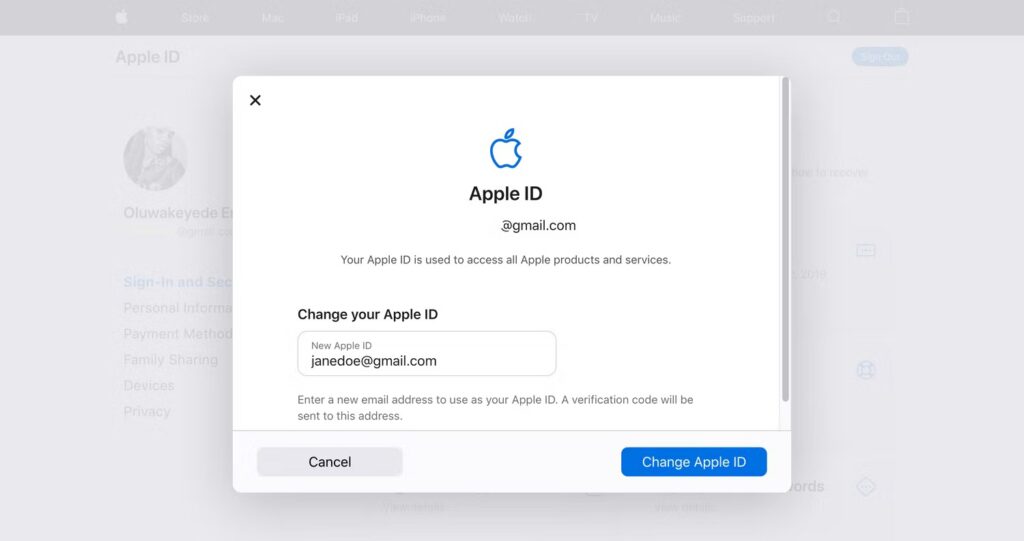
3. Step Three: You’ll see a dialog box titled ‘Change your Apple ID’. Input your new email address in the respective field. Note, if the email address you enter is being utilized by another Apple user, it’s unavailable for use. Unless the other user dissociates that email from their Apple account, you’ll have to opt for a different email address or create a new Apple ID.

4. Step Four: After entering your new email, click ‘Change Apple ID’. You will be prompted to enter a verification code that was sent to your new email address. Check your email’s inbox and input the received code into the provided empty fields. In case you’re struggling to find the verification code, ensure you’re checking the correct email or look for the recent email from ‘noreply@apple.com’.
5. Step Five: Post entering the verification code, the dialog box will close, indicating a successful Apple ID email change.
6. Step Six: Now, log in to all your Apple devices and services using your new Apple ID. Note, you can’t change an Apple ID within 30 days of the last change.
Essential Tip: Apple ID change is feasible only for non-Apple email addresses, such as those on domains like @gmail.com, @hotmail.com, or @yahoo.com. If your Apple ID uses an Apple domain like @icloud.com, @me.com, or @mac.com, an ID change is not possible.
Master the Art of Switching Your Apple ID Email via Your iPhone Settings
Utilizing your iPhone’s inbuilt settings option, it’s possible to change your ID email address effectively. Follow these detailed, easy-to-follow steps to ensure a smooth transition:
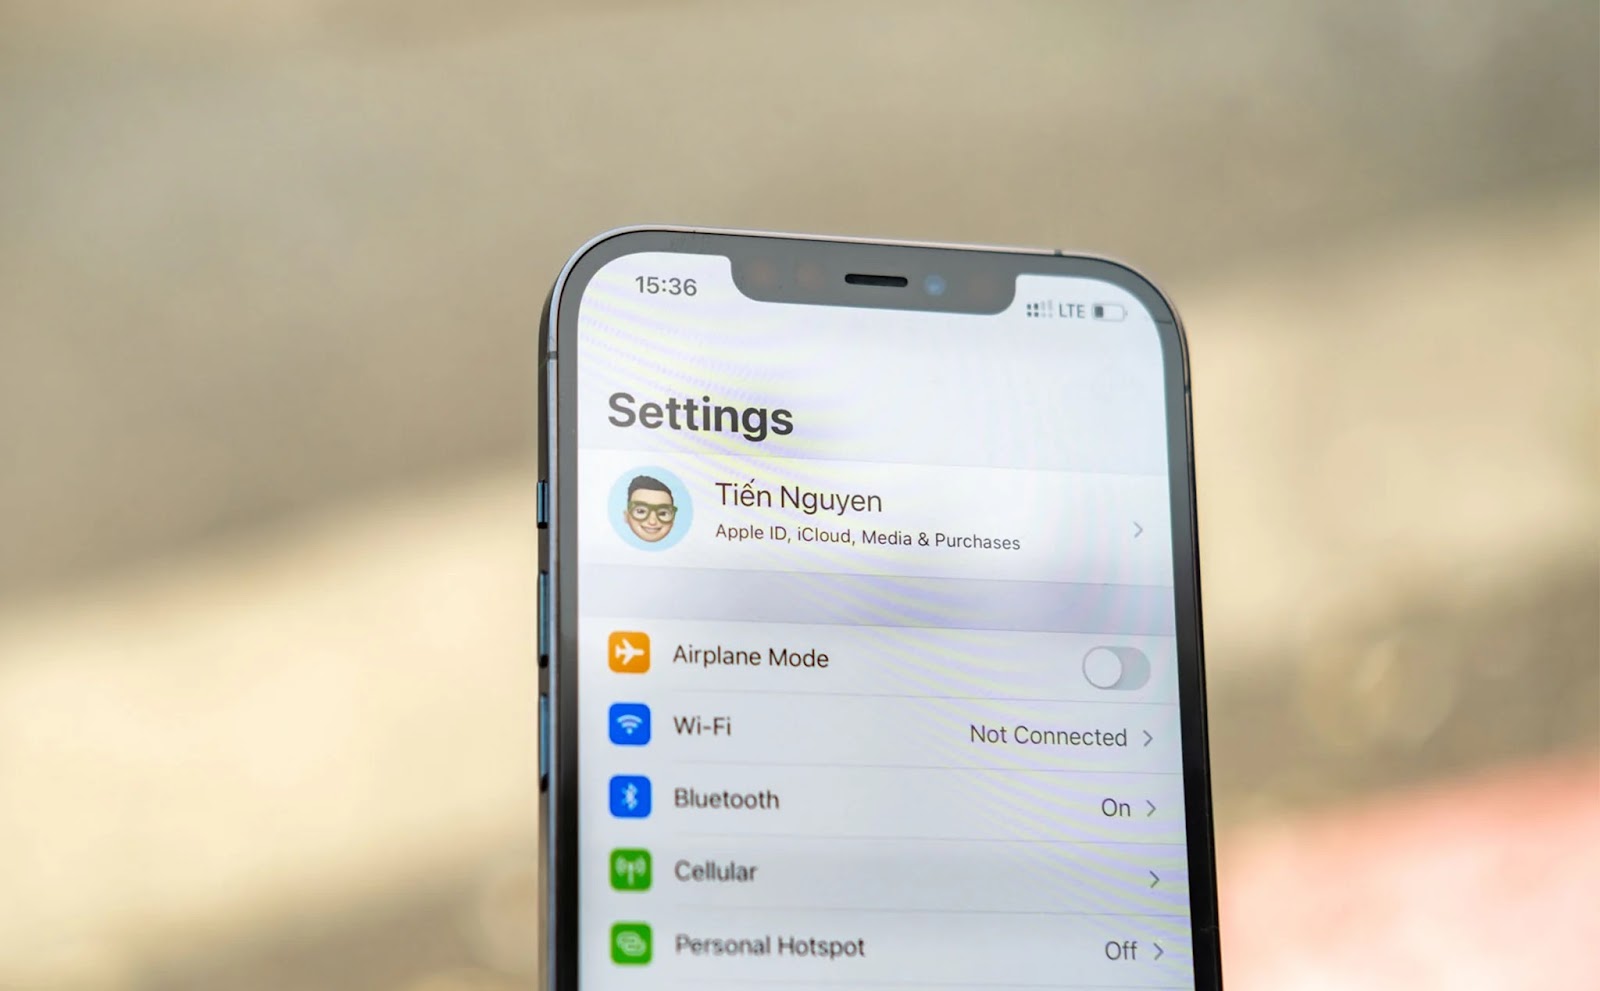
- Step One: Launch the Settings application on your iPhone;
- Step Two: Tap on your name, displayed prominently at the top of the screen, which subsequently opens the section labelled ‘Name, Phone Numbers, Email’;
- Step Three: In the following interface, locate the ‘Contactable At’ section and tap ‘Edit’;
- Step Four: Observe a red minus (-) icon next to your current ID email. Tap on it, and then click ‘Delete’ which appears on the right-hand side of the screen. Be certain before doing this, as it prompts the removal of the existing email from the ID;
- Step Five: A pop-up screen will appear asking for confirmation of this action. Click ‘Continue’ to affirm your decision to replace your current ID email;
- Step Six: You’ll be directed to a new page where you can input the new email address you wish to associate with your ID;
- Step Seven: Lastly, Apple will send a verification email to the newly added ID email address. Check your inbox and follow the instructions to verify your change.
Bear in mind these crucial tips before jumping into this process:
- Preserve Your Data: Backup your iPhone before starting this procedure. It’s a preventive step to ensure that potential glitches or mistakes won’t lead to loss of valuable data;
- Multi-device Update: If you employ multiple devices, you’ll need to update the new Apple ID email on each one of them. This ensures uninterrupted access to all services across the devices;
- Duplicated Email Issue: If you encounter a message stating your preferred email is already in use, that means another user is currently utilizing it. In such a case, you’ll either have to select a different email address or reach out to support for assistance.
Final Thoughts
Navigating the digital world, particularly mastering the art of managing your Apple ID email, isn’t as complex as it might seem at first glance. With a comprehensive understanding of the step-by-step process for iPhone, Mac, or via the official website, you can ensure that your Apple ID email is always up-to-date and relevant. This not only maintains seamless access to Apple’s services across all your devices but also boosts your user experience. Ensuring you back-up crucial data before starting, using an easily accessible email, and updating all your Apple devices promptly after the change are key to a smooth transition. With these skills in your digital toolkit, you’re fully equipped to manage your Apple ecosystem effectively.


Leave a Reply