The post Enhance Your Inbox: Pin & Flag Emails in Outlook appeared first on Fakeinbox.
]]>Flagging and Pinning Messages in Outlook.com
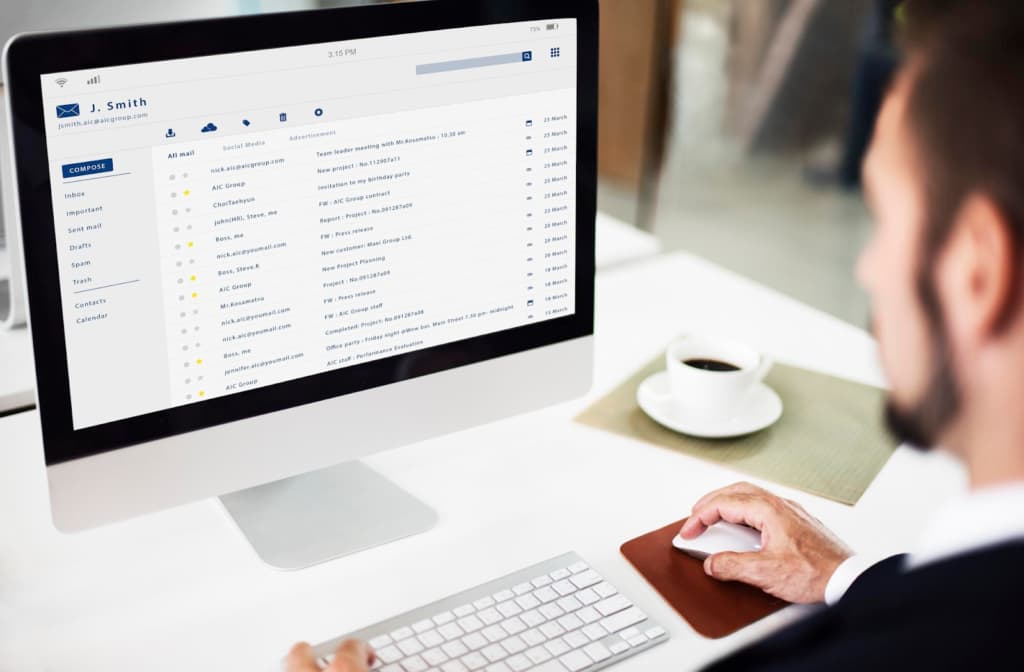
Outlook.com facilitates efficient email management through its intuitive flagging and pinning mechanisms. Flagging is particularly useful for users who deal with a high volume of emails and need to earmark messages for later review. This feature creates a visual reminder, making it simpler to return to important communications.
Pinning complements this by securing selected emails at the top of the inbox, providing immediate access to vital information. Whether it’s an urgent project update, an important meeting invite, or a critical reminder, these functionalities empower users to maintain an organized and focused inbox.
Manual Email Pinning Process
Manually pinning emails in Outlook across its various platforms—web, desktop, and mobile—offers a straightforward way to prioritize your communications. This process involves a simple action—hovering over an email and selecting the pin icon. This can be particularly beneficial for emails that require immediate action or constant reference. By manually selecting which emails to pin, users can customize their inbox to reflect current priorities, ensuring that important messages are always within easy reach.
This method is especially useful for individuals who prefer to have direct control over the organization of their emails, allowing for flexibility and immediate adjustments.
Automatic Email Pinning Strategy
Outlook’s web application enhances email prioritization by enabling the automation of pinning by creating custom rules. This feature is designed to save time and increase efficiency by automatically pinning emails based on specific criteria, such as sender, subject keywords, or receipt date. For example, users can create a rule to automatically pin all emails from a manager or key client, ensuring these messages stand out.
This automated approach to email management is ideal for users who regularly receive important communications from consistent sources, as it helps to maintain an organized inbox without the need for manual intervention.
Utilizing Clean Email for Automatic Pinning
Clean Email, a third-party email management tool, offers an innovative solution for automating the organization of your inbox. By integrating with Outlook, Clean Email provides users with advanced features that go beyond the basic functionalities of flagging and pinning. Users can set up auto-clean rules that automatically sort, archive, or pin emails based on sender, subject, or content.
This not only ensures that important messages are highlighted but also helps in managing the overall clutter in your inbox. Clean Email’s intuitive interface and powerful automation capabilities make it an invaluable tool for users looking to optimize their email management strategy further.
Pinning Emails in the Outlook Desktop and Mobile App
The desktop and mobile applications of Outlook extend the convenience of email pinning, offering users a cohesive experience across devices. Pinning emails on these platforms is just as simple and effective as on the web, ensuring that regardless of the device you’re using, important messages can be easily accessed. This feature is handy for professionals on the move, allowing them to keep crucial emails at their fingertips.
The ability to pin emails in the mobile app means that even when away from the desktop, users can remain organized and focused, ensuring that no important communication is missed.
Exclusive Tips for Efficient Email Handling
- Prioritize Visually: Utilize flags for emails requiring follow-up, creating a visually distinct reminder.
- Keep Important Emails Accessible: Pin emails that you refer to often, ensuring they remain at the top of your inbox.
- Automate for Efficiency: Set rules to automatically pin emails from specific senders, saving time and effort.
- Organize with Tools: Consider third-party tools like Clean Email for advanced sorting and pinning capabilities.
Comparative Analysis: Manual vs. Automatic Pinning
| Feature | Manual Pinning | Automatic Pinning |
|---|---|---|
| User Intervention | Required for each email | Set once via rules; no further action needed |
| Flexibility | High – users choose which emails to pin | Medium – depends on predefined rules |
| Efficiency | Lower – time-consuming for numerous emails | Higher – automates the process |
| Best for | Few important emails that change frequently | Regular emails from specific senders |
| Customization | Pin or unpin at any time | Rules must be edited for changes |
| Recommended for | Users with varying priorities | Users with consistent email sources of importance |
Video Guide
To answer all your questions, we have prepared a video for you. Enjoy watching it!
Conclusion
By embracing Outlook’s flagging and pinning features, along with supplementary tools like Clean Email, users can dramatically enhance their email management efficiency. Whether through manual or automatic methods, the key to a tidy inbox lies in the strategic prioritization of messages.
The post Enhance Your Inbox: Pin & Flag Emails in Outlook appeared first on Fakeinbox.
]]>The post Sending Encrypted Emails in Outlook: A Complete Guide appeared first on Fakeinbox.
]]>Understanding S/MIME Protocol: A Tool for Securing Email Conversations
S/MIME, or Secure/Multipurpose Internet Mail Extensions, is a prevalent standard used for securing email communication. Its primary role is to provide authentication and encryption to your emails, ensuring that only the authorized recipient has access to the message’s content. This mechanism utilizes digital email certificates to operate efficiently.
Below, we’ve outlined an easy-to-follow guide that explains how you can use an S/MIME certificate to send and receive encrypted emails.
Step 1: Acquisition of an S/MIME Certificate
The journey to secure email communication begins with procuring an S/MIME certificate. You can acquire this certificate from a trusted third-party provider like Comodo or Sectigo. To get this certificate, you’ll need to submit personal identification information, including your full name and email address.
Step 2: Initiating the S/MIME Certificate Installation
After obtaining the S/MIME certificate, your next step is to install it in your email client, in this case, Outlook. The certificate installation procedure may vary based on the email client in use. In Outlook, the sequence is: File > Options > Trust Center > Trust Center Settings > Email Security > Import/Export. Following this path will lead to the successful installation of the certificate.
Step 3: Setting up the Email Client for S/MIME
Once the S/MIME certificate has been installed, you need to tweak your email client settings to accommodate S/MIME. Within Outlook, this process involves navigating to: File > Options > Trust Center > Trust Center Settings > Email Security. Here, you can specify the certificates to be utilized for signing and encrypting emails. Additionally, you have the flexibility to modify other security settings according to your preference.
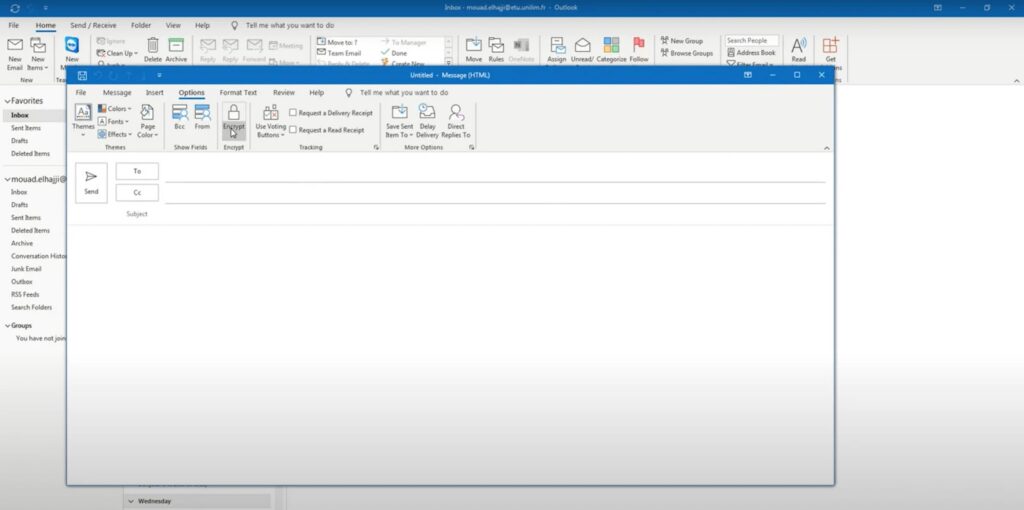
Step 4: Dispatching the Encrypted Email
With S/MIME now set up, you’re ready to send encrypted emails. As you draft a new email, head over to the “Options” tab and enable the “Encrypt” option. Remember, for the recipient to successfully decode your email, they must have an S/MIME certificate installed in their email client.
Step 5: Decrypting Received Encrypted Email
To decrypt a received encrypted email via S/MIME, the sender must have installed your S/MIME certificate in their email client. Upon receipt of an encrypted email, the notification “The email is encrypted” will appear. To decode this email, you must ensure the necessary S/MIME certificate is installed in your email client.
Understanding Email Encryption: Securing Your Business Communication
Demystifying Email Encryption
Electronic mail encryption is a method of securing digital communication that converts understandable text into a scrambled, indecipherable format. This approach ensures that only the intended recipient, possessing the correct decryption key, can decipher the data. Electronic mail encryption is especially crucial when dealing with sensitive information that could pose a potential risk if accessed by unauthorized individuals.
In this digital age, cyber threats are a constant challenge. Cybercriminals use sophisticated methods, such as breaching electronic mail communication, to gain access to vital information like names, contact details, and login credentials. This stolen data can be used for harmful activities like identity theft and fraud.
Majority of electronic mail is securely encrypted during transmission. However, once received, the data is usually stored in plain text, which could easily be accessed by unauthorized individuals, including some electronic mail service providers. This situation is especially prevalent with free electronic mail providers that do not offer end-to-end encryption, leaving a loophole for seasoned hackers.
Electronic mail encryption systems leverage public-key cryptography and digital signature technologies to protect sensitive electronic mail content. Therefore, by implementing electronic mail encryption, users can ensure only the intended recipient can access their electronic mail content.
The Ins and Outs of Electronic Mail Encryption
Electronic mail encryption is instrumental when relaying sensitive information. When an electronic mail undergoes encryption, readable plain text is converted into scrambled ciphertext. The only party capable of decoding this cryptic message is the intended recipient, who possesses the crucial private decryption key.
The Framework of Electronic Mail Encryption
Contrary to conventional systems, electronic mail encryption architecture leverages gateway software to enforce policy-based encryption. This arrangement allows businesses to define which electronic mails require encryption and under what circumstances.
For example, it’s common for businesses to enforce a policy requiring encryption for all electronic mails containing sensitive data like personally identifiable information (PII), financial details, or other confidential information.
Electronic mail encryption software often comes in the form of a client installed on users’ desktops, laptops, or portable electronic devices. This service provides the flexibility for users to choose which electronic mails to encrypt, utilize policy-based encryption for specified electronic mails, or implement both simultaneously.
While electronic mail gateways focus on securing local network communication, some encryption solutions lay emphasis on securing the device itself. Even so, with the advent of web-based interfaces capable of reading and decrypting encrypted messages, installing electronic mail encryption software directly onto a user’s device is becoming less of a necessity.
These electronic mail encryption solutions are hosted either privately by the firm or, more commonly, provided by an electronic mail encryption software provider as a cloud-based service.
Strengthening Digital Communication: Exploring Email Encryption Techniques
Deep Dive Into Email Encryption Approaches
Apart from the widely used S/MIME and TLS encryption models, encrypted PDFs and web portal encryption also hold significant value in securing email communication. Here, we delve deeper into these techniques.
Encrypted PDFs: A Secure Way to Share Files
An encrypted PDF, zip, or Office file ensures that clients can access and download secure documents and attachments onto their devices, enhancing the confidential nature of the shared content.
How does email encryption come into play here? If an unauthorized entity were to intercept and attempt to utilize the email’s contents, they’d encounter a jumbled array of characters, an outcome of the encryption process.
The beauty of encrypted PDF attachments is that they ensure legibility across all devices and guarantee secure delivery to the intended recipient. Moreover, as the user downloads the attachment, they can access it offline at their convenience, further adding to the flexibility and functionality of this method.
Web Portal Encryption: Safeguarding Emails in Transit
In web portal encryption, the recipient must access a specific webpage to read the encrypted email. As the email is shielded by a shared key before being sent to the online portal, it meets the criteria of email encryption.
The recipient’s email application, like Outlook, Mailbird, and others, dispatches the encoded email directly to the designated website. This setup fortifies the email security, making it unreadable to anyone without the requisite login information for the portal.
By employing web portal encryption, you effectively minimize your risk of cyber-attacks, as this restricts the number of individuals with access to your company’s emails. So long as the recipient’s password remains secure, web portal encryption provides a robust shield against hackers seeking to access critical data transmitted over the internet.
Examining the Array of Email Encryption Techniques: PGP, S/MIME and TLS
Unveiling the Mechanics of Pretty Good Privacy (PGP)
PGP is a renowned data encryption and decryption program that provides cryptographic privacy and authentication for data communication. Launched in 1991, it was one of the earliest publicly accessible programs featuring the key cryptography component.
Today, both individuals and organizations employ PGP as a strong shield for their online communication, including emails and text messages.
This solution employs a combination of data compression, symmetric and asymmetric key methodologies, and various hashing functions to secure data in transit. Moreover, PGP provides a distinctive perspective on the public key infrastructure (PKI) approach.
In simpler terms, when a user sends a message via PGP, the information gets encrypted using their public key. The recipient then uses their private key to decrypt the message upon its receipt, thereby ensuring secure communication.
Harnessing Secure Multipurpose Internet Mail Extension (S/MIME)
S/MIME is a standard developed by the Internet Engineering Task Force (IETF) to facilitate public-key encryption and digital signatures. Originally created by RSA Data Security, S/MIME is now integrated into most modern email software systems.
While S/MIME offers capabilities similar to PGP, it necessitates that users obtain their keys directly from a designated Certificate Authority (CA).
Exploring Transport Layer Security (TLS) Protocol
The Transport Layer Security (TLS) protocol phased out the Secure Sockets Layer (SSL) to assume the mantle of safeguarding digital messaging across computer networks, including email, voice over IP (VoIP), and instant messaging.
Introduced in 1999 and based on the original SSL specifications, TLS was adopted as an IETF standard. Providing data privacy and integrity between computer applications is one of the chief objectives of TLS. This protocol incorporates both the TLS handshake and record protocols and operates at the application layer.
One popular variant of TLS is STARTTLS, a command that converts plaintext communication into secure, encrypted messaging. STARTTLS encrypts emails in transit, meaning neither the sender nor the receiver needs to take any action to secure the content.
While this approach is advantageous in countering passive monitoring attacks, it may render businesses susceptible to other threats such as man-in-the-middle (MITM) assaults.
Conclusion
In conclusion, sending encrypted emails in Outlook is a simple and effective way to protect your sensitive information from cyber threats. By following the steps outlined in this guide, you can ensure that your emails remain secure and confidential. Remember to always use strong passwords for your digital certificate and verify the recipient’s encryption capabilities before sending an encrypted email. Stay safe and keep your communication secure with encrypted emails in Outlook.
The post Sending Encrypted Emails in Outlook: A Complete Guide appeared first on Fakeinbox.
]]>The post Changing Your Email on Instagram: A Guide appeared first on Fakeinbox.
]]>Occasionally, these responsibilities seem to hang around indefinitely due to their perceived complexity or simply our lack of know-how. Imagine finding yourself procrastinating on an essential task, such as updating your email on your Instagram profile. The reluctance could be stemming from the fear of having to create a new account, or worse, losing access to your existing one.
Put those concerns aside. The process for changing your email on Instagram is relatively straightforward and hassle-free. The next segments will guide you through the uncomplicated steps to update your email on Instagram without the risk of losing your account or having to start all over again.
Updating Your Primary Email on Instagram
In an era where professional email addresses are becoming increasingly important, you might want to replace an old email account, perhaps one created during your school days. Or perhaps your email address is simply attracting too much spam, prompting a clean start. Regardless of the reasoning, updating your contact info on Instagram is essential for ensuring all important notifications reach your primary email. Here’s how to do it:
Changing Your Email on Instagram on Mobile Platforms (iPhone and Android)
Follow the steps outlined below to change your email on Instagram using your iPhone or Android device:
- Open the Instagram application on your mobile device;
- Tap on your profile photo, located in the lower right-hand corner of the screen;
- Select the three horizontal lines present on the upper right-hand side of your profile page;
- From the dropdown menu, select ‘Settings’;
- Choose the ‘Account’ option;
- Tap on ‘Personal Information’;
- Input your new email address in the provided space.
These steps are also handy if you simply want to verify the email address currently linked to your Instagram account.
Changing Your Email on Instagram on Desktop
If you prefer using Instagram on a desktop, follow these steps to change your email:
- Navigate to Instagram.com in your preferred web browser;
- Click on ‘Profile’, located at the bottom of the sidebar on the left;
- Select ‘Edit Profile’, found to the right of your username;
- Enter your new email address in the appropriate field;
- Click on ‘Submit’.
You’ll receive an email confirmation link. Click on it to finalize the update.
Changing Your Instagram Email Without Logging Into the App
Perhaps you’ve taken a break from social media and can’t recall your Instagram login details. Here’s how you can change your email address using the account recovery feature:
- Open the Instagram app and tap on ‘Forgot password?’ at the bottom of the screen;
- Enter your username and tap on ‘Next’;
- Tap on ‘Can’t reset your password?’ at the bottom of the screen;
- Submit a request for email change support.
Adding Your Phone Number to Your Instagram Account
Adding a phone number to your Instagram account is another excellent way to safeguard your account. You can also change your email address and phone number simultaneously to maximize efficiency. Here’s how:
- Open the Instagram app;
- Tap on your profile photo in the lower right-hand corner;
- Tap on the three lines in the top-right corner;
- From the pop-up menu, choose ‘Settings’;
- Choose ‘Account’;
- Select ‘Personal Information’;
- Input your phone number.
Modifying Additional Personal Information on Instagram
In the process of registering for Instagram, users provide certain data like an email address and a phone number. These details are easily modifiable, as the previous sections demonstrate. Additionally, users may have furnished details such as a birthdate or gender. To edit these details, follow the process below:
- Launch the Instagram application;
- Click on your profile picture, located in the bottom right corner of the app interface;
- Select the three horizontal lines found at the upper right corner of the screen;
- From the dropdown menu, select ‘Settings’;
- Choose ‘Account’;
- Select ‘Personal Information’;
- Alter the gender or birthday fields as required. The gender field allows you to input a custom option or select ‘Prefer Not to Say’.
Exploring Other Handy Settings on Instagram
Instagram provides various useful features within your account settings to enhance your app experience. Exploring these features can lead to a more customized, secure, and enjoyable interaction with the app.
While navigating through your Instagram account settings, consider checking out these options:
- Close Friends: Design a list of preferred followers who alone can view Stories you wish to share exclusively with them;
- Avatar: Create a personalized avatar that bears a striking resemblance to you;
- Request Verification: If you are a celebrity, artist, or burgeoning Instagram sensation, apply for account verification by filling out and submitting the provided form;
- Saved Posts: View the posts you’ve saved over time. This option eliminates the need to scroll through old posts or search for specific ones, such as a vegetarian lasagna bowls recipe. Instead, save your favorite posts for easy access;
- Language Preference: Use your Instagram language settings to brush up on your language skills. Are you preparing for a trip to Paris and need to polish up your French? Set French as your Instagram language to aid your learning process;
- Sharing to Other Applications: Customize how Instagram shares your content on other platforms;
- Adding a Business Account: Promote your business by setting up a professional account.
Conclusion
In essence, Instagram is more than just a social media platform for sharing beautiful pictures; it’s a tool that can be tailored to suit your personal or business needs. With the knowledge of how to modify your email, phone number, gender, birthdate, and more, you gain control over your personal information and how it gets used. Combining these abilities with the exploration of other underutilized settings, such as setting up a business account, changing the app’s language, and curating a close friends list, you can maximize your Instagram experience. Now, there’s no need to hesitate on updating your information or exploring new features.
The post Changing Your Email on Instagram: A Guide appeared first on Fakeinbox.
]]>The post Ultimate Guide: Whitelisting An Email In A Single Attempt appeared first on Fakeinbox.
]]>Suddenly, it dawns on you – perhaps the email got rerouted to your spam box! Hastily, you explore your spam emails and breathe a sigh of relief as you spot the coveted receipt.
To dodge such future predicaments, whitelisting the email senders you trust is the key. This ensures that the mails you intend to read and receive land exactly where they ought to – your primary inbox. As an added bonus, if you’re in the email marketing realm, you can avert any potential client misconceptions by urging the recipients of your company’s emails to whitelist your email address.
Deconstructing Email Whitelisting and Its Importance
Email whitelisting is a technique that permits specific email addresses or domains to bypass stringent spam filters. By allowing these addresses to land in your inbox rather than your spam folder, it ensures that all essential messages get the attention they deserve.
Just like your smartphone’s contact list that includes numbers from your family, friends, employees, and local takeaway spots, email whitelisting works on a similar principle. However, instead of phone numbers, it involves email addresses. Once you have them whitelisted, your email client acknowledges these addresses, ensuring that you never miss an email from them.
Benefits of whitelisting mostly revolve around convenience and efficiency:
- It ensures that all essential emails land directly in your inbox;
- It allows you to keep track of important communications;
- For email marketers, it increases deliverability rates;
- It reduces spam complaints, thus maintaining a healthy sender score.
The Difference Between Whitelisting and Blacklisting
While whitelisting and blacklisting might seem like two sides of the same coin, they serve opposing functions. Whitelisting is like giving a VIP pass to selected email senders, ensuring their communications land straight in your inbox. On the other hand, blacklisting is akin to putting up a ‘No Trespassing’ sign, blocking selected senders and rerouting their emails directly to your spam folder.
For businesses striving to maintain robust communication channels with their customers and clients, sustaining a low blacklist count is crucial. Receiving numerous complaints can lead to a reduced sender score. If this score reaches alarmingly low levels, email service providers may direct all your outgoing messages to spam, an outcome that can only be reversed with recipient-initiated whitelisting.
A Step-by-Step Guide to Whitelisting Emails
Whitelisting an email address involves a few straightforward steps. However, the process can vary slightly based on the email service provider. The ultimate aim is to add the email address or domain to your approved contacts, so all future emails from them reach your inbox, bypassing the spam folder.
Let’s now delve into the process of whitelisting emails for various service providers.
Gmail Whitelisting
Gmail, with over a billion users daily, is one of the most popular email service providers in the world. To whitelist an email in Gmail:
- Click on the settings button, represented by a gear-like icon on the top-right corner of your screen;
- Navigate to the “Filtered and Blocked Addresses” tab;
- Click on “Create a new filter” and input the email address or domain you want to whitelist;
- After entering the details, click on “Create filter” to approve the changes.
If you’re using Gmail’s mobile app, you can whitelist emails through these steps:
- Go to your Spam or Junk folder;
- Select the message you want to whitelist;
- Click on the “Report not spam” option.
All future emails from this sender will land in your primary inbox.
Whitelisting in Outlook
To whitelist an email in Outlook:
- Select the gear icon and choose “View all Outlook settings.”;
- Choose “Mail,” then “Junk mail” in the secondary menu;
- Click the “Add” button under “Safe Senders and Domains.”;
- Type in the email address or domain you want to whitelist;
- Click “Save” to confirm your changes.
In the Outlook mobile app, you can whitelist individual senders by selecting the desired email address, clicking the three dots on the top-right corner, and choosing “Move to focused inbox.”
Whitelisting in Yahoo! Mail
To whitelist an email in Yahoo! Mail:
- Click on the Settings icon and select “More Settings.”;
- Choose “Filters” and then “Add new filters.” Input the sender’s email address or domain name here;
- Click “Save” to ensure that all future emails from this sender go to your primary inbox.
Mail mobile app, you can whitelist email addresses by clicking on the “+” symbol next to the sender’s email and choosing “Add to contacts.”
A Comprehensive Guide to Whitelisting Emails Across Various Platforms
Email whitelisting is a universal feature across all email service providers, though the specifics may vary slightly with each platform. This guide will help you navigate through the whitelisting steps across different email services.
Whitelisting Emails in AOL Mail
AOL Mail offers an effortless process to whitelist an email sender:
- Open the email from the sender you wish to whitelist;
- Click on the sender’s name and select “Add Contact” from the drop-down menu that appears.
All future emails from this sender will land in your main inbox, ensuring that you never miss an important message from them.
Whitelisting in Zoho Mail
Zoho Mail users can whitelist an email sender via the Settings menu:
- Navigate to the “Anti-Spam List,” then tap on the “Email Address” tab;
- Select “Whitelist/Blacklist Emails” and choose “Add New Whitelist Email.”;
- Input the desired email address and hit the Enter key to finalize the update.
This action guarantees that all emails from the whitelisted address bypass the spam filter to reach your main inbox.
Whitelisting in Proton Mail
Proton Mail users can add a sender to their whitelist by following these steps:
- Go to the Settings menu and select the “Filters” tab;
- Click on “Add New Filter” under the Whitelist section;
- Enter the email address you want to whitelist and click “Save.”
By doing so, your email client will identify the whitelisted address as a trusted sender, ensuring their emails aren’t mistaken as spam.
Whitelisting in Apple Mail (OS X and iOS Devices)
Apple Mail allows privileged access to desired senders via these steps:
- Click on the sender’s address in their email;
- A drop-down menu will appear, allowing you to select “Add to VIPs” or “Add to Contacts” to whitelist their email address.
While VIP contacts appear under a special email message tab, emails from regular contacts land directly in your primary inbox.
Whitelisting in Android Email Clients (Default Client)
Android has simplified the whitelisting process to a one-step action:
- Open the desired sender’s email;
- Click on the sender’s picture;
- Click “Add to Contacts” to whitelist their address.
This process ensures that no emails from this address are mistakenly categorized as spam.
Whitelisting in Windows Live Desktop
For Windows Live Desktop users, whitelisting can be done thus:
- Navigate to the alert ribbon at the top of the email from unknown senders;
- Click the “Add to Safe Senders list” link.
This action automatically whitelists the sender, marking their emails as safe.
Managing Emails for Efficiency and Focus
Opting to whitelist preferred email addresses can significantly declutter your inbox by filtering out unwanted messages. Rather than allowing spam to inundate your inbox, you can divert such emails to designated folders like spam or promotions. This way, your inbox remains streamlined with communications solely from approved contacts, while still having the flexibility to check other folders when needed.
Whitelisting proves to be a time-saving practice as quickly scanning through sender names and subject lines may seem minor initially but accumulates into substantial time savings over the long run. Reclaiming this valuable time daily allows for more focus on essential tasks that matter to you.
In a business context, having subscribers whitelist your email signals their active interest in engaging with your content.
Enhanced Whitelisting Functions and Considerations
Certain email providers offer advanced features within their whitelisting capabilities. Platforms like Google, Outlook, and Yahoo Mail enable users to create custom mail folders beyond the standard primary inbox and spam folder. These additional features cater to specific user needs, allowing for message categorization based on priority, content, or sender.
For instance, executives might benefit from organizing email folders by department, high-priority contacts, or clients. Similarly, individuals can segregate their messages into personal correspondence, advertisements, and work-related emails.
By utilizing the whitelist feature to direct emails to designated folders, you optimize your time and productivity, ensuring that each folder contains relevant communications.
Moreover, whitelisting serves as a crucial security measure, safeguarding against potential threats. Hackers often create fake email addresses resembling those of known contacts. By whitelisting authentic email addresses, the risk of receiving fraudulent emails in your primary inbox diminishes, redirecting such suspicious emails to the appropriate folders like spam.
Conclusion
In essence, email whitelisting is an efficient tool that customizes your email inbox to your preferences and ensures crucial communications are never missed. As it varies slightly across different email service providers, understanding the steps involved in AOL Mail, Zoho Mail, Proton Mail, Apple Mail, Android email clients, and Windows Live Desktop can greatly enhance your digital communication efficiency. By adopting these steps, you can optimize your email encounter, save yourself from the clutter of unnecessary mails, and focus on what matters most. Remember, your inbox, your rules!
The post Ultimate Guide: Whitelisting An Email In A Single Attempt appeared first on Fakeinbox.
]]>The post Step-by-Step Guide to Sending Encrypted Emails in Outlook appeared first on Fakeinbox.
]]>Encryption in email communication isn’t just about choosing a random method, but it involves intricate decision-making. This varies from readily available built-in options to third-party add-ins. These varied offerings allow users the flexibility to both send encrypted emails and receive protected messages in a manner that suits their preferences and needs.
However, understanding the best encryption method isn’t a one-size-fits-all solution. A multitude of factors come into play when choosing the appropriate encryption for secure emailing. Key aspects include the identity of the recipient, the email account from which the encrypted emails are to be sent, the overall usability, cost, and compatibility of the chosen encryption method, as well as its feature set.
Method 1: The Certificate-based Encryption Method – S/MIME
S/MIME, otherwise known as Secure/Multipurpose Internet Mail Extensions, is an older method of email encryption, and it has some limitations. Primarily, this strategy requires both the sender and the recipient to have installed and shared their encryption certificates, which can be an expensive endeavor. This method of securing emails may not be compatible with free webmail platforms such as Gmail and Yahoo. Moreover, S/MIME encryption is not widely supported, making it potentially unsuitable for diverse recipients. In addition, this method carries risks such as vulnerability to outside attacks and possible compromises in encryption keys used.
Getting Started with S/MIME Encryption
For those who choose to utilize S/MIME encryption, the initial setup on Outlook includes few steps:
- Procure an email encryption certificate and import it into Outlook. Subsequently, share this certificate with your desired recipients;
- Ensuring that all recipients have installed the encryption certificate on Outlook or a compatible platform;
- Familiarize oneself with the process of sending an encrypted email.
There are multiple certificate authorities (CAs) from which one can acquire an email encryption certificate, with notable ones being Comodo, GlobalSign, or IdenTrust. The correct certificate to purchase is the email security certificate, also referred to as an S/MIME encryption certificate or secure email certificate, as opposed to the SSL certificate.
Once you receive the certificate and password necessary for email encryption, it is a good practice to keep a backup. This backup will be crucial if your computer is damaged or if you need to set up email encryption on a new device.
The next step is to import the certificate into Outlook:
- Click on the ‘File’ tab on the top left of the Outlook window, followed by ‘Options’;
- Select the ‘Trust Center’ in the subsequent window and click on ‘Trust Center Settings’;
- In the left pane, select ‘Email Security’, then under the ‘Digital IDs (Certificates)’ heading, select ‘Import/Export’;
- Follow the prompts to confirm and complete the certificate import process.
After successfully importing the certificate, it can be shared with recipients through a digitally signed message.
Sending Encrypted Emails with S/MIME
Sending an encrypted email using S/MIME requires the public key portion of the receiver’s certificate. With this, their certificates can be added to your contact data. Here’s how you can do it:
- Open the digitally signed email by the recipient you wish to send an encrypted message to;
- Right-click on the sender’s name and click on ‘Add to Outlook Contacts’;
- Select the correct certificate for your contact from the list that appears.
Following these steps, you can now send encrypted emails using S/MIME by:
- Composing a new message as usual;
- Clicking on the ‘Options’ tab;
- In the ‘Properties’ window that pops up, clicking on ‘Security Settings’;
- In the ‘Security Properties’ window, selecting ‘Encrypt message content and attachments.’;
- Clicking ‘OK’ and ‘Send’ after finishing your email.
Reading Encrypted Emails
Recipients can read your encrypted email on their desktop computer using the Microsoft Outlook application, which will automatically decrypt the message for them. If the sender’s encryption certificate has been added to the contact card, replies to these messages will also be automatically encrypted.
Costs and Features of S/MIME
S/MIME encryption is user-friendly once set up and can be a fitting option for companies dealing with large enterprise clients or government agencies. However, it’s not the best fit for those collaborating with small businesses or individuals, primarily because of its lack of universal compatibility and the costs involved.
Also, encrypted emails cannot be accessed outside of the Outlook application, and recipients may not be able to forward encrypted emails to others. It’s also important to note that G-Suite email accounts using GSSMO cannot use S/MIME, and will need to use IMAP instead.
In terms of cost, in 2019 the certificate prices from Microsoft’s recommended CAs ranged between $39 and $369 annually. This fee recurs every year or once every 2-3 years if the period is paid up-front. Each user within an organization will require a unique certificate.
Method 2: Office 365 Message Encryption (OME)
The Office 365 Message Encryption (OME) is a proprietary email encryption option available to Office 365 users. It offers an efficient way to send encrypted emails to any recipient, irrespective of the email service they use. However, it’s noteworthy that this encryption method requires a valid Office 365 subscription and the Outlook application installed on your device. The process for the recipient to access the email involves a few additional steps, like obtaining a unique code and using the code to decrypt the email.
Initial Setup for Office 365 Message Encryption
OME comes with certain Office 365 subscription plans. It is not included in popular plans like Office 365 Business Essentials and Business Premium. Subscription plans that have Office 365 Message Encryption include Office 365 Enterprise E3 or E5, Microsoft Enterprise E3 or E5, Microsoft 365 Business, Office 365 A1, A3, or A5, and Office 365 Government G3 or G5. As an alternative, you could add Azure Information Protection Plan 1 to your Office 365 subscription, although this could be complicated and cost-intensive.
The steps to upgrade your Office 365 subscription are as follows:
- Visit the Office 365 website and login with an admin account;
- Navigate to Admin > Billing > Subscriptions;
- Click on Switch Plans to upgrade your subscription.
After this, you can verify the availability of OME in one of two ways:
- On www.outlook.com, sign in with an account linked to the Office 365 subscription and compose a new email. If the Encrypt button is not grayed out, encryption is enabled;
- In the Outlook application (Outlook ProPlus is recommended), compose a new email and click on Options. The Encrypt button should be enabled.
Sending Encrypted Emails in Outlook Using OME
The process to send an encrypted email using OME is quite straightforward. When composing a new message, you simply need to:
- Click on the Encrypt button located under the Options tab;
- If you wish to prevent forwarding of the encrypted email, click on the arrow beneath the Encrypt button;
- Complete your email and click Send.
Opening Encrypted Emails
When a recipient receives an email encrypted with OME, they’ll get a prompt to verify their identity via Office 365. After clicking on ‘Read the message’, recipients can choose to verify using a one-time passcode or by logging into a school or work account. Users of free webmail services like Gmail or Yahoo may be prompted to log into their respective platforms. If the recipient doesn’t have an Office 365 account associated with the email address, they should opt for the one-time passcode option. Microsoft Office 365 Message Encryption will send a separate email with the passcode. After entering the passcode, the recipient will gain access to the email.
Receiving Secure Email from Clients (Replies, New Emails)
Recipients can easily respond to encrypted emails by clicking on Reply All, Reply, or Forward. However, they won’t be able to send new encrypted emails to the original sender using OME.
Features and Cost
OME is a user-friendly encryption method that allows access to encrypted messages outside of Outlook. It doesn’t require regular backups of certificates and certificate passwords, and the secure messages can be accessed on any device with Outlook installed and an Office 365 account logged in. Recipients can even forward secure messages to others without the need for exchanging certificates or passwords. However, the requirement for Outlook ProPlus, the additional steps for the recipient, and the lack of an option to set expiration dates for messages are certain limitations of this method.
The cost of OME is included in the upgraded Office 365 subscription. The additional cost for upgrading the subscription can vary depending on the current subscription plan. OME is recommended for professional email interactions, particularly when interacting with vendors or entities that must adhere to specific security regulations.

Method 3: Outlook Encryption Add-ins
For small organizations with limited IT support, Outlook Encryption Add-ins provide a seamless way to send secure emails to recipients, even if they don’t have their own encryption. This method is user-friendly as it doesn’t require any recipient setup, installation, or sign-in. Additionally, it is likely the most cost-effective option available.
Initial Setup:
Setting up an email encryption add-in usually involves installing the software. Visit the add-in’s website, download the installer, and run the installation process, which typically takes around a minute. The installation steps may vary slightly depending on the browser being used, such as Internet Explorer, Google Chrome, or Firefox.
To get started, launch or restart the Outlook application and start composing a new email. Look for the Secure Send button at the top left of the window. If visible, you can then send encrypted emails from Outlook to any recipient’s email address, regardless of their platform.
Sending Encrypted Messages:
To send an encrypted email, click on the New Email button in Outlook, compose your message (including any necessary attachments), and ensure that the content should be encrypted. Instead of clicking Send, use the Secure Send button to encrypt both the email’s contents and attachments.
Opening Encrypted Emails:
While the subject of the email remains unencrypted, the body of the email will be secured. When the recipient opens the email, they will see a prompt to access the encrypted content without needing an external passcode. The sender can also set an expiration time to maintain security levels.
Receiving Secure Emails and Replies from Clients:
Recipients viewing the secure message may have the option to send a secure reply. Depending on the specific Encryption Add-in used, recipients might be able to respond securely to non-encrypted messages as well.
Outlook Email Encryption Features and Costs:
Features and pricing vary among providers. Trustifi, for instance, offers users full control over their email security, tailoring services to individual and organizational needs. Trustifi provides NSA-grade encryption, comprehensive inbound and outbound protection, and unique features like easy recall, blocking, modification, and setting expiration times for emails already sent. With customized solutions available, Trustifi’s plans and pricing can be adjusted to suit each organization’s requirements and budget.
Conclusion
In summary, organizations can enhance the security of their email content and attachments sent through Outlook by utilizing digital certificates such as SMime, Office 365 Encryption OME, or encryption add-ins. Encryption add-ins, which combine the benefits of SMime and OME, provide the most user-friendly experience and cost-effectiveness. Compatible with any email account for both senders and recipients, tools like Trustifi’s Encryption Addins offer unparalleled convenience and protection.
The post Step-by-Step Guide to Sending Encrypted Emails in Outlook appeared first on Fakeinbox.
]]>The post Outlook and Office 365 Encryption Guide appeared first on Fakeinbox.
]]>Understanding Email Encryption in Outlook and Office 365
Overview of Email Encryption
Email encryption serves as a shield against unauthorized access to the content of your messages by converting the text into a code that only authorized recipients can decipher. This process ensures that even if intercepted, the information remains confidential and secure. In Outlook and Office 365, encryption plays a vital role in protecting sensitive data from cybercriminals and maintaining the integrity of your communications.
Methods of Encrypting Emails
- Using the Outlook Desktop Client: Access the encryption feature by navigating to Options in a new email message. Click on the Encrypt option under the Lock icon and choose the encryption type based on your needs;
- Using the Outlook Web Client: Encrypt emails directly from the web client by clicking on the lock icon in a new email. Select either Encrypt or Prevent Forwarding to secure your message before sending it out.
| Encryption Type | Description |
|---|---|
| Encrypt Only | Allows recipients to forward the email while keeping the content encrypted. |
| Do Not Forward | Prevents recipients from forwarding, copying, or printing the email content. |
Licensing Requirements for Office 365 Message Encryption (OME)
Subscription Prerequisites
To access Office 365 Message Encryption (OME), specific licensing requirements must be met within your subscription plan. OME is available in Microsoft 365 Business Premium, Microsoft 365 E3, and E5 subscriptions, offering enhanced security features for your email communications.
Licensing Options
- Microsoft 365 Business Premium: Includes OME as part of its comprehensive security package;
- Microsoft 365 E3 and E5: OME is also available in these enterprise-level subscriptions, providing advanced encryption capabilities for organizations with higher security needs.
| Subscription Level | OME Availability |
|---|---|
| Microsoft 365 Business Premium | Included |
| Microsoft 365 E3 | Included |
| Microsoft 365 E5 | Included |
Methods to Encrypt Emails in Outlook and Office 365
Securing Your Messages
Encrypting emails in Outlook and Office 365 is a straightforward process that adds an extra layer of security to your communications. By following these methods, you can ensure that your sensitive information remains protected from unauthorized access.
Steps to Encrypt Emails
- Log in to Office 365: Access your account and navigate to Outlook to begin composing a new email;
- Choose Encryption Type: Within the email options, select the Permission tab and specify the encryption type based on your preferences.
| Encryption Method | Steps to Encrypt Email in Outlook |
|---|---|
| Using Outlook Desktop | 1. Navigate to Options in a new email. |
| 2. Click Encrypt under the Lock icon. | |
| 3. Choose encryption type (Encrypt Only or Do Not Forward). | |
| Using Outlook Web | 1. Click the lock icon in a new email. |
| 2. Select Encrypt or Prevent Forwarding options. |
Advanced Encryption Features in Office 365
Enhancing Security Measures
Office 365 offers advanced features that allow users to customize their encryption settings and automate the encryption process for specific scenarios. These additional functionalities provide a higher level of control and flexibility in securing your email communications.
Customization and Branding
- Logo and Background Color: Customize the appearance of encrypted emails with your organization’s logo and preferred background color;
- Disclaimer Text: Add a disclaimer to your encrypted messages to inform recipients about confidentiality policies.
| Feature | Description |
|---|---|
| Customization | Personalize encrypted emails with logo and colors. |
| Disclaimer Text | Include a disclaimer to communicate confidentiality. |
Implementing Automatic Encryption Rules in Office 365
Streamlining Security Protocols
By setting up mail flow rules in the Exchange Admin Center, organizations can automate the encryption process for specific email criteria. This proactive approach ensures that sensitive information is always protected without manual intervention, enhancing overall data security.
Mail Flow Rules
- Create Encryption Rules: Define conditions that trigger automatic encryption for incoming and outgoing emails;
- Specify Encryption Actions: Determine the encryption type and restrictions applied to emails meeting the rule criteria.
Leveraging Email Redaction for Enhanced Data Protection
Redacting Sensitive Information
Email redaction tools, such as those available through Strac Office365 Email DLP, enable organizations to detect and remove sensitive data from email bodies and attachments. This proactive measure helps prevent inadvertent data leaks and ensures compliance with data protection regulations.
Benefits of Email Redaction
- Data Loss Prevention: Safeguard against accidental disclosure of confidential information;
- Compliance Assurance: Meet regulatory requirements by identifying and redacting sensitive data proactively.
| Redaction Tool | Key Benefits |
|---|---|
| Data Loss Prevention | Prevent accidental data leaks in email communications. |
| Compliance Assurance | Ensure adherence to data protection regulations. |
Conclusion
In conclusion, email encryption is a fundamental aspect of maintaining data security and privacy in both personal and professional communications. By utilizing the encryption features available in Outlook and Office 365, users can safeguard sensitive information from cyber threats and unauthorized access. Understanding the methods to encrypt emails, licensing requirements for advanced encryption features, and leveraging additional functionalities for customization and automation are crucial steps in enhancing email security.
The post Outlook and Office 365 Encryption Guide appeared first on Fakeinbox.
]]>The post Email Confirmation Guide for Scratch Platform appeared first on Fakeinbox.
]]>Why Email Confirmation is Crucial
The email address confirmation on Scratch was established for a variety of reasons including:
- Enabling users to subscribe to the Scratch Team’s email updates;
- Eliminating problems associated with password resetting;
- Reducing the risk of unauthorized access to accounts;
- Preventing misuse of the platform;
- Allow parents control over their children’s interactions with the community.
Consequences of Not Confirming Emails
Failing to verify an email address on Scratch results in a variety of limitations for the user. Accounts that haven’t been verified through email are unable to receive invitations to join studios, leading to a notification that reads, “Could not invite a curator with that username,” whenever an attempt is made. This restriction stems from the fact that certain functionalities of a user’s account are only unlocked after their email has been confirmed. In addition to this, the ability to comment on profiles is turned off until email verification is completed. Users will also find themselves unable to follow other users and studios, post comments, participate in forum discussions, change their profile icons, or update the information in their ‘About me’ and ‘What I’m Working On’ sections without email confirmation.
Easy Steps to Confirm Your Email on Scratch
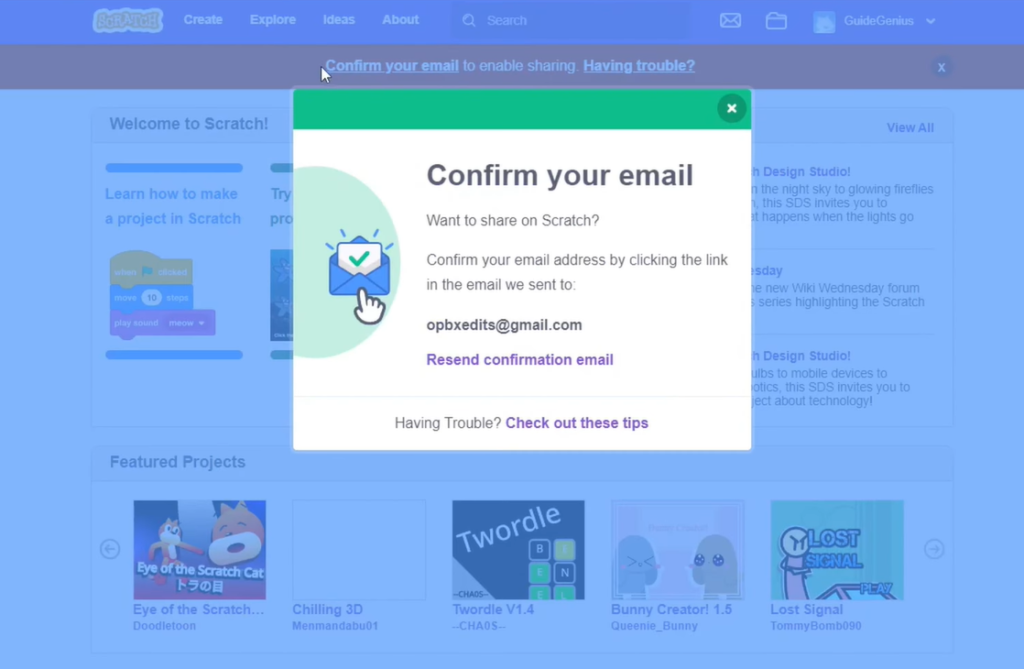
To validate your email address, follow these steps:
- Navigate to the ‘Email Tab’ on the Account Settings page on the Scratch Website;
- If your account predates the update, an email is already dispatched. If not, click ‘Send.’;
- Access the email account;
- Locate an email requesting confirmation. Press ‘Confirm my email address’ or alternatively use the link beneath the button.
Email Address Modification Process
Even after an email address has been confirmed, it can still be modified. To do this, navigate to the Account Settings.
Troubleshooting Solutions for Email Confirmation
If you cannot locate the confirmation email, it might have landed in the spam folder or updates/promotions if Gmail is used. If the email is still missing, you can resend the email by going into ‘Account settings,’ selecting the email option, and choosing ‘Resend confirmation email’.
Practical Tips for Using Scratch
Aside from confirming your email address on Scratch, there are other practical tips that can enhance your user experience. These include understanding how to effectively use the platform’s features for project creation, learning how to collaborate in studios, and understanding the best ways to engage with the Scratch community.
Conclusion
Confirming your email is an instrumental part of leveraging the full potential of Scratch. It facilitates seamless communication, minimizes potential security issues, and enhances the overall user experience. By following the provided steps, any user can successfully confirm their email and enjoy the myriad of benefits that Scratch offers. Additionally, knowing how to change your confirmed email and troubleshoot possible issues can come in handy. With these tips and the understanding of why email confirmation is crucial, users are equipped to reap maximum benefits from the Scratch platform.
The post Email Confirmation Guide for Scratch Platform appeared first on Fakeinbox.
]]>The post Understanding the Pearson Vue Trick (PVT) After the NCLEX appeared first on Fakeinbox.
]]>The Process and Timing
After completing the NCLEX, candidates typically receive an email from the testing service, prompting some to attempt the PVT for an early indication of their result. It’s crucial to understand that NCLEX results undergo a two-step verification process: an initial automatic grading and a subsequent review by Pearson Vue staff to ensure accuracy. This dual verification usually concludes within the first 24 hours post-examination.
How the PVT Works

To perform the PVT, candidates may attempt to re-register for the exam using a payment card. The trick lies in deliberately entering incorrect payment information (such as the card’s security code) while attempting this re-registration. The system’s response to this attempt can offer clues about the candidate’s test outcome:
- Good Pop-Up Messages: Indicate a high likelihood of passing. These messages state that another registration cannot be made at the time due to a recently scheduled exam or an existing open registration;
- Bad Pop-Up Message: Implies a possible failure. This message alerts to a card decline due to various reasons;
- Neutral Message: Indicates a hold on the test results for further review, without implying pass or fail status. Reasons for a hold include suspicious test behaviors or technical issues.
Interpretation and Limitations
While receiving a good pop-up is generally a positive sign, and a bad pop-up may suggest failure, the PVT is not infallible. The accuracy of this method relies on the correct execution of the trick. Misinterpretation of the pop-up messages or incorrect execution can lead to false assumptions about the test outcome.
It’s worth noting that a small number of candidates report inconsistencies between the PVT outcome and their official results. Thus, while the PVT can serve as a preliminary indicator for some, it should not replace official results or be seen as a definitive measure of success or failure.
Conclusion
The Pearson Vue Trick has become a popular method among NCLEX test-takers seeking early insights into their exam performance. Although it offers a glimmer of hope or prepares one for disappointment, it’s essential to approach the PVT with an understanding of its limitations and the knowledge that it is not a guaranteed indicator of the official results. The most reliable way to confirm NCLEX outcomes remains the official results from Pearson Vue or the respective Board of Nursing. In the interim, candidates are advised to stay positive, avoid excessive stress, and prepare for any outcome with resilience and determination.
The post Understanding the Pearson Vue Trick (PVT) After the NCLEX appeared first on Fakeinbox.
]]>The post How to Send High Importance Emails appeared first on Fakeinbox.
]]>Understanding Message Importance
The importance level of an email can play a pivotal role in determining the speed and nature of a recipient’s response. To ensure that your message is perceived and acted upon as intended, consider the following steps:
- Identify the Urgency: Before sending an email, evaluate its urgency. Is it a critical update that requires immediate attention, or can it wait? This initial assessment is vital for setting the correct tone and expectation;
- Marking High Importance: For emails that contain urgent information or tasks demanding swift action, mark them as “High Importance.” This is not just a label; it’s a signal to the recipient about the critical nature of the email. It highlights the necessity for prompt attention and action, ensuring that the message stands out in a crowded inbox;
- Choosing Low Importance for Informative Messages: When your email is meant to inform rather than prompt immediate action—such as general updates, informational newsletters, or non-urgent communications—opt for the “Low Importance” marker. This distinction helps in managing the recipient’s expectations and allows them to prioritize their email responses more effectively;
- Communicate Expectations Clearly: Beyond marking an email for its level of importance, it’s beneficial to clearly state your expectations within the email body. If a response is needed, mention the preferred timeframe. For informational emails, a simple acknowledgment might suffice;
- Respect Recipient’s Time: Understanding and respecting the recipient’s time can foster a more considerate email culture. By judiciously using the importance markers, you convey respect for the recipient’s workload and priorities, encouraging a healthier communication environment.
The act of categorizing emails by their importance not only aids in better inbox management but also enhances the efficiency of email communication. It ensures that critical messages receive the attention they need, while informational ones do not add unnecessary pressure. This nuanced approach to email communication can significantly improve the clarity and effectiveness of your interactions.
Initiating a New Email
Starting a new email is the first step in the communication process. Upon opening your email client, look for the “New Email” button, which is typically prominently displayed. This action opens a fresh composition window where you can begin crafting your message.
Adjusting Importance in the Email Composition
Within the composition window, attention to detail in conveying the message’s urgency is key. The “Tags” group on the Ribbon, a feature found in many email clients, offers options to set your email’s importance level. Here, you can choose between “High Importance” or “Low Importance,” depending on the nature of your message. Most email platforms display a visible indicator next to the message—either in the inbox list or the email header—to highlight the set importance, making it immediately apparent to recipients.
Monitoring Importance Settings
As you compose your email, keeping an eye on the “Tags” group within the Ribbon ensures that the importance level is correctly set. If either “High Importance” or “Low Importance” is highlighted, it signifies that the setting is active for the current message. This feature aids in avoiding any miscommunication regarding the email’s urgency.
Editing Importance for Received Emails
There are scenarios where the importance of an email you’ve received may need to be adjusted post-reception. To amend the importance level of a received email, one must first open the email by double-clicking it, as changes cannot be made from the preview pane in the Reading Pane. Within the “Tags” group on the Ribbon, selecting the “More” arrow leads to the “Message Options” dialog.
Here, the “Importance” dropdown menu allows for a change in the email’s importance level. After selecting the desired option, closing the dialog and the email prompts a save confirmation from the email client, such as Outlook, where confirming the save solidifies the changes.
Conclusion: The Value of Proper Importance Settings
Adopting a strategic approach to setting email importance ensures that messages are not only received but also given the attention they deserve based on their urgency. This practice fosters more efficient communication, aids in better time management for both sender and recipient, and underscores the sender’s respect for the recipient’s workload and priorities. By meticulously adjusting the importance level of emails, both senders and recipients can navigate their inboxes more effectively, leading to a smoother, more productive communication flow.
The post How to Send High Importance Emails appeared first on Fakeinbox.
]]>The post Faxing Documents via Email in Outlook appeared first on Fakeinbox.
]]>Getting Started with Faxing from Outlook
Individuals seeking to streamline their faxing process can do so by leveraging their Outlook account for both sending and receiving faxes. This integration begins with registering on Fax.Plus using an Outlook account. Once set up, users can simply compose a new email in Outlook to start the faxing process. The recipient’s fax number is entered in the “To” field, appended with “@fax.plus.” Documents intended for faxing are attached as email attachments, and the body of the email can serve as the fax cover sheet. Sending this email initiates the fax transmission to the desired fax number(s).
The Mechanics of Email Faxing
The concept behind faxing from an email account involves utilizing an online fax service, such as Fax.Plus, linked with one’s email. This method eliminates the need for traditional fax machines and other hardware, enabling all faxing needs to be met directly from an existing email account.
When a fax is sent from Outlook, Fax.Plus converts the email content into a fax-compatible format and dials the recipient’s fax number to transmit the message as a traditional fax. This functionality extends to receiving faxes, where Fax.Plus forwards any faxes sent to the user’s online fax number directly to their email inbox.
Comprehensive Guide to Faxing from Outlook
Fax.Plus’s email to fax feature supports faxing from any version of Outlook across various devices, including laptops, desktops, and mobile devices. This flexibility ensures that users can send and receive faxes from Outlook, access delivery reports for sent faxes in their inbox, and enjoy a seamless faxing experience from anywhere.
Step-by-Step Faxing Process:
- Adding the Recipient’s Fax Number: Navigate to the Send Fax section and input the recipient’s complete fax number in the “To” field, including the country and area codes. It’s possible to fax documents to multiple recipients simultaneously;
- Attaching Documents for Faxing: Users can attach the documents they wish to fax. An optional fax cover sheet can also be included to provide additional details about the recipient;
- Fax Transmission: Upon sending the fax, users await a confirmation report, which is delivered via email, push notification on the Fax.Plus mobile app, or can be viewed on the Web dashboard.
This guide underscores the efficiency and convenience of faxing through Outlook, ensuring that users can integrate this technology into their business workflows seamlessly.
Conclusion
The integration of faxing capabilities with Outlook represents a significant advancement in the realm of digital communication, merging the reliability of traditional faxing with the convenience of modern email systems. By adopting this method, businesses and individuals can enjoy a seamless, efficient, and secure way to manage their faxing needs without the necessity for physical fax machines or additional hardware. The process, supported by platforms like Fax.Plus, not only streamlines the workflow but also enhances productivity by enabling faxing directly from a desktop, laptop, or mobile device. As digital communication continues to evolve, the ability to fax from Outlook is a testament to the innovative solutions designed to meet the dynamic needs of users worldwide.
FAQs:
No, you do not need a physical fax machine. Sending faxes from Outlook is done entirely online through services like Fax.Plus, which convert your emails into fax format.
Yes, you can receive faxes directly in your Outlook inbox. Faxes sent to your online fax number provided by Fax.Plus will be forwarded to your email.
Yes, you can send a fax to multiple recipients simultaneously by entering their fax numbers in the “To” field, separated by a semicolon or as instructed by your fax service provider.
You will receive a confirmation report via email, push notification on the Fax.Plus mobile app, or it can be viewed in your Web dashboard, indicating the status of your fax transmission.
The post Faxing Documents via Email in Outlook appeared first on Fakeinbox.
]]>